Saturday, March 5, 2011

Acetate Front Card

I made this style card for the first time this week and I'm sure it's one Debbi came up with a while ago, so credit goes to Debbi Moore.

Here's what you need

3 pieces of card - 1piece measuring 5x5 and 2 pieces measuring 5x4

1 piece of acetate measuring 5x5

a topper and embellies of your choice.

Sorry forgot to add the acetate to the pic.

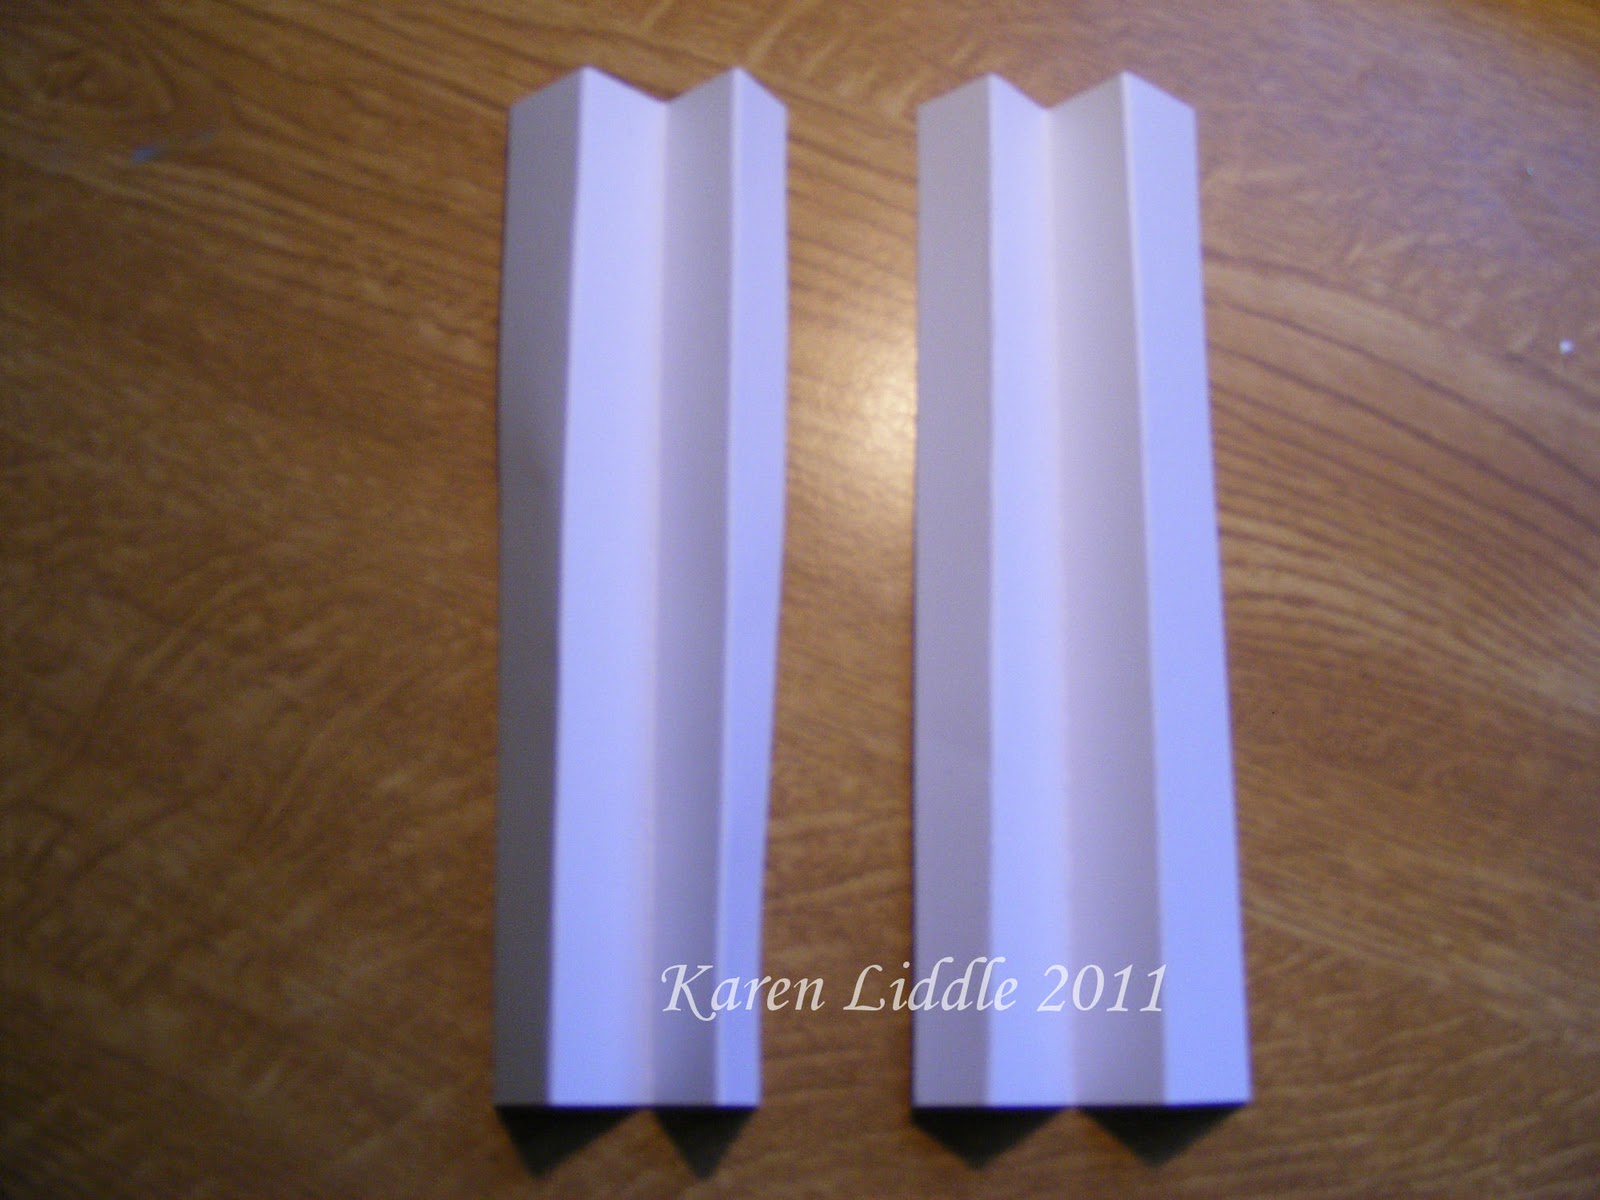
Score the 2 smaller pieces of card at 1, 2 and 3 inch mark and fold as in the picture.

Add your choice of backing paper to the larger piece of card and attach the folded pieces to the sides, at the back, with double sided tape.

Add your choice of topper to the centre piece and decorate the front pieces of the folded sides (this is the part you will see from the front of the card)

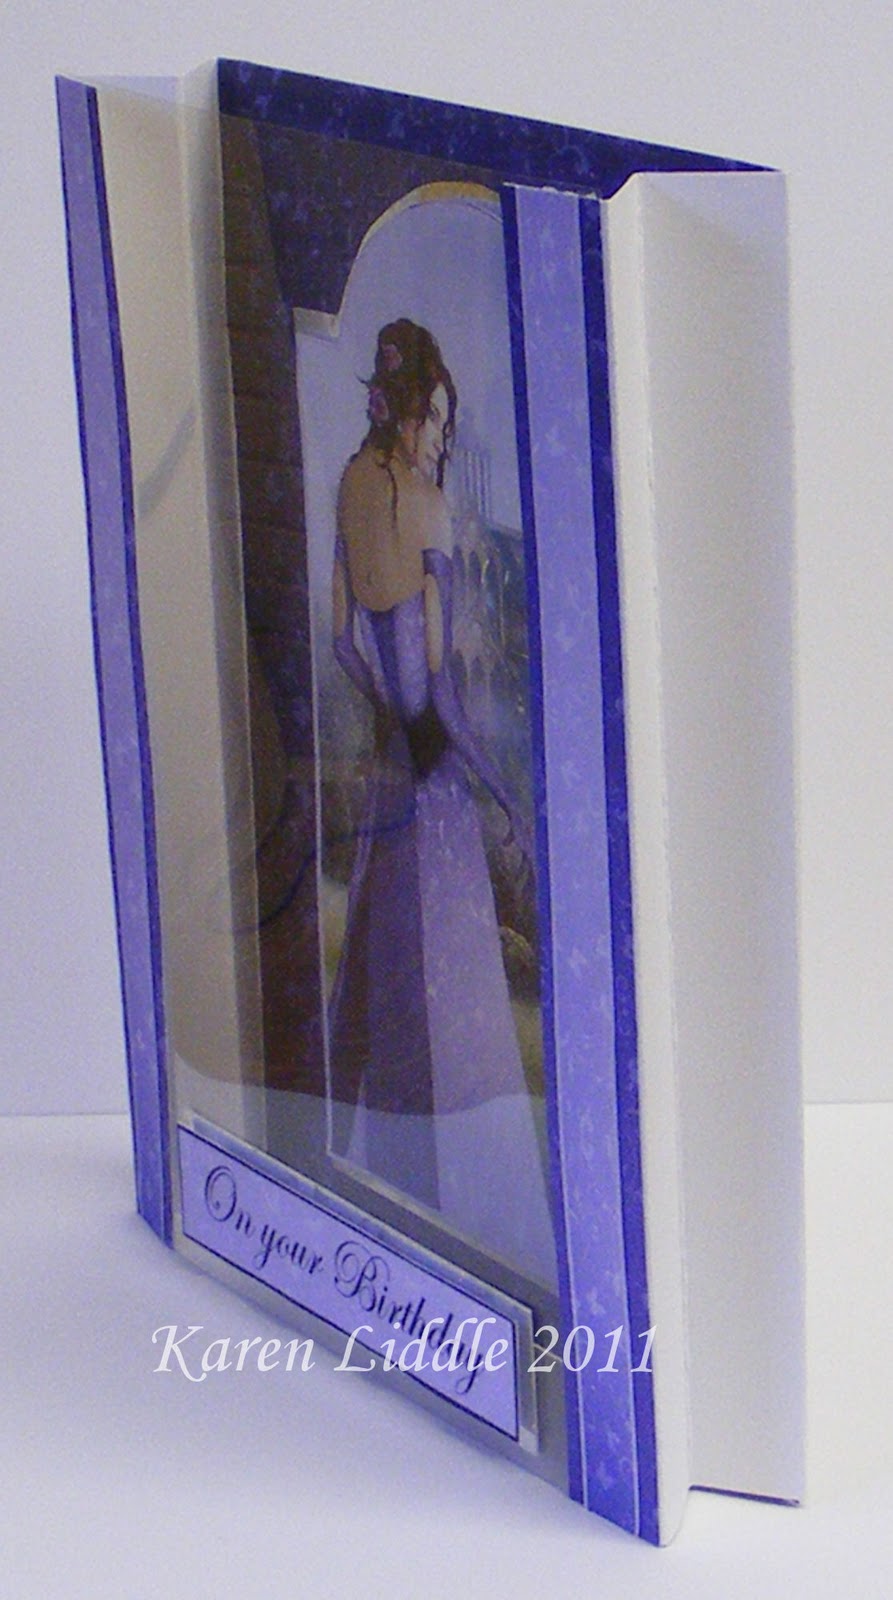
Put some double sided tape down each long side of the acetate.

Now attach the acetate to the folded card sides to the inside of the front fold. Add your sentiment to the bottom of the acetate, on the front side. Add anymore embellies and your done.

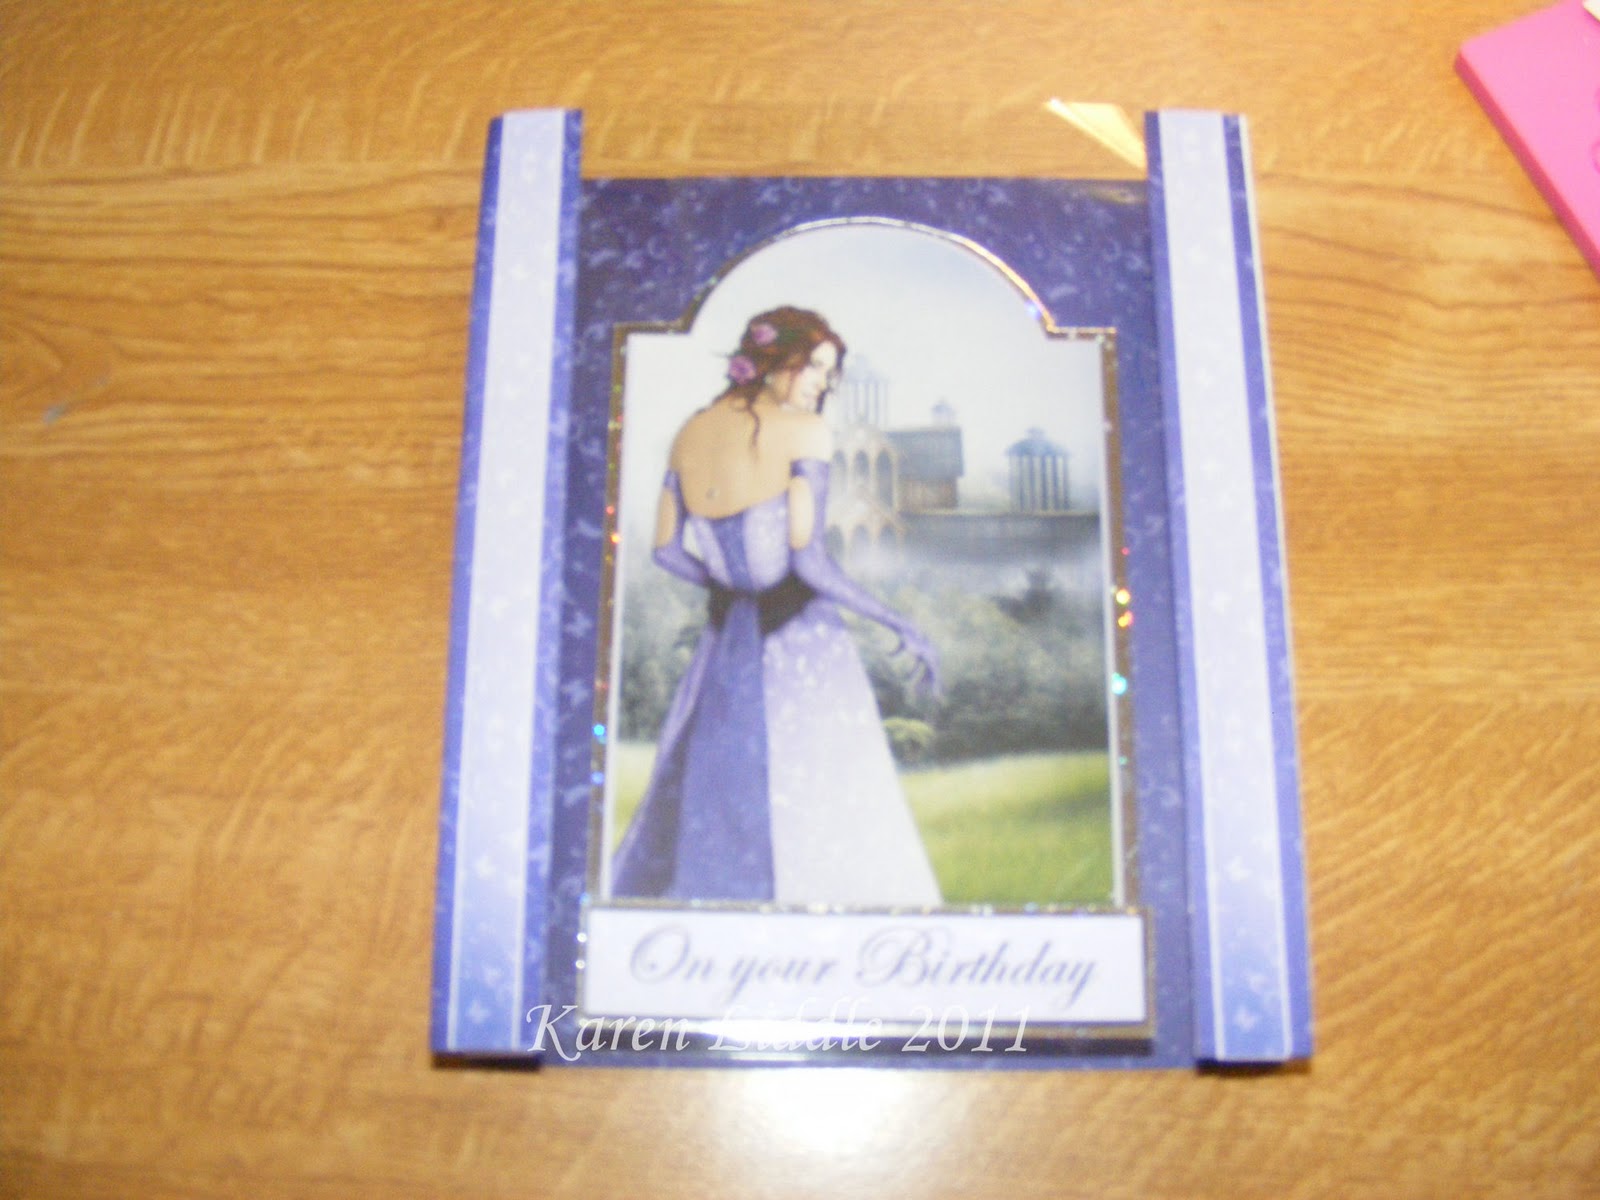
Front view of finished card

Side view of finished card. The papers, image and sentiment I've used on this card are taken from the Debbi Moore Designs Evergreen CD.

Tuesday, January 18, 2011

Ribbon Roses with Kobie

This tutorial was done by Kobie, one of our members over on our forum group on Craft Bubble, and she's been kind enough to let us place it on this blog, to thanks Kobie.
Ok, well over to Kobie.........

Well, Here it goes, my very first Tutorial ever....
I wanted to try some different hand made flowers to use on some of my projects and this is what I made........

You will need:Some Ribbon - Preferably 1.5 cm wide or bit wider.

You need about 50 cm or you can use more depending on how full you want the end result of your rose want to be.

Needle & Thread

Stitch the Ribbon down the length, Just below the middle of the Ribbon.

Make sure your thread is quite long as you will need enough to stitch to the end and make some stitches to hold the rose together.

When you come to the end of the ribbon do not cut of the needle.

Pull on the thread for the ribbon to ruffle.Now start Rolling your rose from the end where your needle is attached after each roll make a stitch to the previous layer to hold your flower in place.

When you come to the end fold back the end a little to give it a nice finished look give it a blind stitch to secure it, if you want to you can give an few extra stitches around the flower once you have finished the rolling just to make sure it is nice and secure.

Once you have done that you can reshape it a bit with your fingers to give it the look you like.....

Hope everyone found this helpful and clear enough, if not please let me know if your unsure or uncertain about something and I will try my best to improve it where possible!

Enjoy and be warned they can be quite addictive....

Thank You for taking your time to look at my blog, Please know that all comments are welcome and very much appreciated!

Hugs Kobie

Friday, January 14, 2011

Colouring With Distress Inks

Here's what you need, sorry I forgot to take a pic.....
Selection of Distress Inks
Water Brush or Paint Brush and Water
Water Colour Card
Choice of stamp
Versafine Ink Pad
Piece of Kitchen Roll

Stamp up your image and start with the skin.
I use Tattered Rose for skin and start by applying a light covering over all skin areas, try not to get your card too wet. I dab of any excess water onto the kitchen roll as I go.Go back and add more of the same shade, but now start where shadows would be and as the colour runs out blend in so you don't get a hard line where the colour ends.

Continue blend the skin till you're happy with the shade adding more colour to the shadowy parts.Once you're happy with the shade of the skin, move on to your next colour and start to add the colour starting again in the shadowy parts, pushing the colour away to the lighter parts. Don't be frightend to leave some parts of your image white where it'll be lightest, you can always colour these very lightly as you go along.
Carry on adding more colour where you think you need it, blending all the time.You can't really blend the colour on the smaller partsColour her hair in just the same way, blending all the time.You can always go back and add more colour so if you're not sure whether to add more, leave it and go back to it when you've finished.

I think the secret with colouring with Distress Inks is to get the amount of water on your brush right and remember to blend the colour, pushing the colour to the lighter parts of the image as you work.

Don't give up if you don't get it right first time, just keep on practising, after all, practice make perfect, doesn't it?
Have Fun!

The colours I used are
Tattered Rose - Skin
Victorian Velvet - Dress
Dusty Concord- Shoes, beads and mirror
Tea Die and Vintage Photo - Hair